Mount the vise so the top of its jaws finishes exactly level with the benchtop — or a hair below — and recess the body so the castings sit under the bench, not proud of its front face. A vise mounted a quarter inch low is a vise you cannot plane against, clamp a long board in, or use with a bench dog. That one dimension is the difference between a vise and an obstacle.
The rest of this is a two-hour job with a drill, a saw and a chisel. Here is the order that avoids the mistakes.
Before you drill: which end of the bench?
A front vise goes on the left front corner of the bench for a right-handed woodworker, and the right front corner for a left-handed one. The reason is planing: you work toward the vise, and you want your dominant hand away from the jaw so the plane can run the full length of the board without your knuckles meeting the vise handle.
Put it at a corner rather than mid-span. A corner gives you two edges to support work against and puts the vise over the leg, where the bench is stiffest. A vise bolted to the middle of an unsupported apron will flex, and a flexing vise cannot hold anything.
Step 1 — check the bench is thick enough
Every vise publishes a maximum benchtop thickness it will fit, and it is the specification people skip. The castings have a fixed distance between the mounting flange and the top of the jaw, and if your top is thicker than that number the jaws will finish below the benchtop surface no matter what you do.
The vises ranked below publish figures from 2-1/4 in. to 3 in. Measure your top before you order, and if it is thicker than the vise allows, your options are to recess the underside of the benchtop or buy a different vise. There is no third option.
Step 2 — pack out a bench that is too thin
The opposite problem is more common and much easier. If your benchtop is thinner than the vise's jaw height, you fit a packing block— a slab of hardwood glued and screwed to the underside of the top, directly behind where the vise will sit, thick enough to bring the mounting flange down to the right height.
Make it larger than the vise flange in both directions, and get its face flush with the front edge of the bench. The packing block is structural: it is what the vise actually bolts to, and the bolts will pull on it every time you tighten the jaws.
Step 3 — mark and drill, in that order
- Hold the vise in position with the jaw top level with the benchtop. A pair of clamps and a helper, or a block cut to exactly the drop height, will hold it while you mark.
- Mark the bolt holes through the flange with a bradawl or a pencil. Mark all of them, then stop and look: do any of them land in the bench leg, a dog hole, or within an inch of an edge?
- Drill clearance holes for the bolts, sized to the bolt rather than tight — you want a little adjustment left, because the first fit is never the last.
- Counterbore from above if you are using bolts through the top, so the heads sit below the surface. A bolt head standing proud of a benchtop will mark every workpiece that crosses it.
Use bolts with washers, not screws. A vise under load tries to pull its flange away from the bench, and lag screws in end grain will work loose. Carriage or hex bolts right through the top with washers and nuts underneath will not.
Step 4 — fit the wooden jaw liners
Almost every cast-iron woodworking vise expects you to add wooden faces, and most ship with holes or countersinks for exactly that. Do not skip this: bare iron jaws bruise everything you clamp and damage the edge of any tool that touches them.
Hardwood, 3/4 in. thick, cut to overhang the castings slightly at the top so the liner — not the iron — finishes flush with the benchtop. Countersink the screws well below the surface, because a chisel or a plane iron will find them eventually. Maple, beech or any dense offcut is ideal; plywood works and looks like it.
Step 5 — set the toe-in
This is the step that separates a vise that holds and one that slips, and it is almost never in the instructions. Plane or shim the frontjaw liner so the jaws are very slightly closer together at the top than at the bottom — about 1/32 in. over the jaw height is the usual figure.
The reason is mechanical. A front vise is cantilevered: tighten it and the screw pulls hardest at its own centreline, which is below the top of the jaw, so the jaw tips outward at the top and grips the workpiece at the bottom only. Toe-in pre-compensates for that deflection, so under load the jaws come parallel and grip along their whole height.
If your vise has steel guide rods either side of the screw, it resists this twisting far better and needs less toe-in. That is what those rods are for, and it is worth paying for on a bench that gets used hard — one of the vises in our vise roundup is picked specifically on that.
Step 6 — check it before you trust it
Clamp a long board vertically in the jaws with only an inch gripped and push on the far end. A properly mounted vise on a properly stiff bench will not move. If the whole bench rocks, the bench is the problem and no vise will fix it — the workbench roundup covers what rigidity actually requires, and how tall a workbench should be covers the other dimension that decides whether you can work at it.
Bench thickness is the specification that decides the purchase
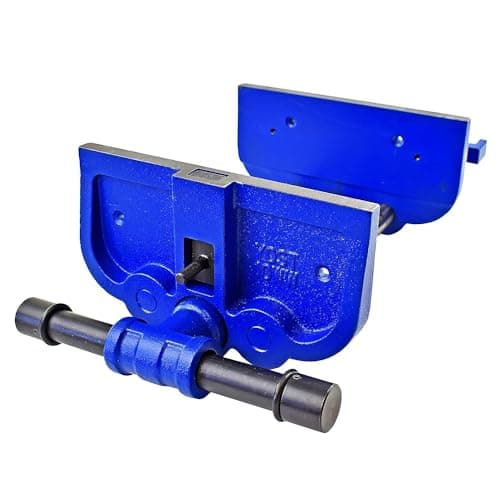
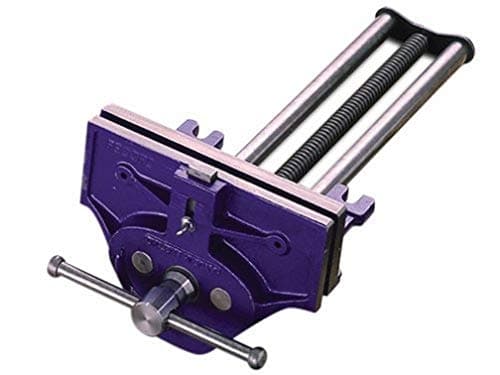
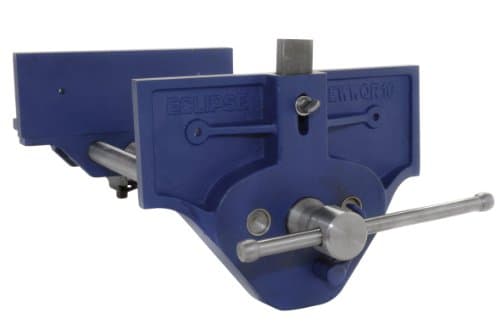
Published listing specifications for the three vises above. Read the right-hand column first: it is the number that tells you whether the vise will physically mount on your bench with the jaws at the right height.
| Vise | Jaw width | Action | Published fit / features |
|---|
| Eclipse quick-release | 10 in. | Quick release | Gray cast iron, front-vise mount |
| Yost 10WW-CA | 10 in. | Screw only | Ductile iron body, bronze alloy nut, fits bench to 3 in. |
| Record 52-1/2ED | 9 in. | Quick release | Cast iron, pop-up bench dog |
Quick release, and whether you need it
A quick-release vise has a split nut you can disengage with a lever or trigger, letting the jaw slide freely instead of winding the screw. On a screw-only vise, going from 1/2 in. to 6 in. of opening is a dozen turns of the handle.
Whether that matters comes down to how you work. If the vise holds one thing for an hour, a screw vise is fine and the money is better spent on jaw width. If you are opening and closing it fifty times a session — which is normal for hand-tool work — quick release stops being a luxury quite quickly.
The pop-up dog, and why it needs planning
A pop-up dog is a small steel peg in the top of the moving jaw that lifts above the surface. With a row of dog holes drilled in the benchtop, it lets you clamp a board flat on the bench between the vise dog and a bench dog — which is how you hold a wide panel for planing without clamps in the way.
It is genuinely one of the most useful things a vise can have, and it is useless without the dog holes. If you buy a vise with a dog, plan the hole row before you mount it: the holes have to line up with the dog's travel, so the vise position determines where they go.
Ductile iron versus gray cast iron
Gray cast iron is the traditional material: rigid, cheap to cast, and brittle — drop it on concrete and it can crack. Ductile iron has the graphite in spheroidal rather than flake form, which makes it far more resistant to shock at similar stiffness.
For a vise bolted to a bench and never dropped, both are entirely adequate, and the published material is a weaker signal than the jaw width and the action. It matters most on the screw and the nut, which is why one of the vises above publishes a bronze alloy nut — a softer nut wears in preference to the steel screw, and a nut is replaceable.
Common mounting mistakes
- Jaws below the benchtop. The one mistake that cannot be worked around. Measure twice, and dry-fit with the liners in place before you drill.
- Lag screws instead of through-bolts. They loosen under cyclic load, and a loosening vise gets worse every time you use it.
- Liners screwed with the heads near the surface. Countersink deeply. You will plane and chisel against these faces.
- No toe-in. The vise grips at the bottom of the jaw only and a board held at the top pivots out. 1/32 in. over the jaw height fixes it.
- Mounting mid-apron rather than over a leg. The bench flexes, so the vise does.
Where these numbers come from
Jaw widths, body materials, nut materials, quick-release mechanisms, bench thickness limits and dog features above are the manufacturers' own published listing specifications, cited per vise in Sources. The 1/32 in. toe-in figure is standard bench-fitting practice, given as guidance rather than measurement — we have not measured jaw deflection under load, we do not have a lab, and our methodology page says so. Prices come from the live price feed.