Wood exchanges moisture with the air around it, indefinitely. It swells as it takes moisture up and shrinks as it gives it off, and it does that unevenly across the grain — which is what cupping, bowing and twisting are. Storage cannot stop that. What good storage does is get the movement over with before you cut, and keep the movement even so the board stays flat while it happens.
Acclimate to the shop, not to the calendar
Lumber reaches an equilibrium moisture content determined by the temperature and humidity of wherever it is sitting. Move a board from a lumberyard shed to a heated shop and it will lose moisture and shrink; move it from a damp garage to a dry house and the same thing happens again, this time after the furniture is built.
So the target is not a number in an article — it is equilibrium with the environment the finished piece will live in. If your shop is a heated space similar to the house, acclimate in the shop. If your shop is an unheated garage and the piece is going indoors, be aware those are different environments and let the milled parts sit inside for a while before final fitting.
Stop guessing: use a meter
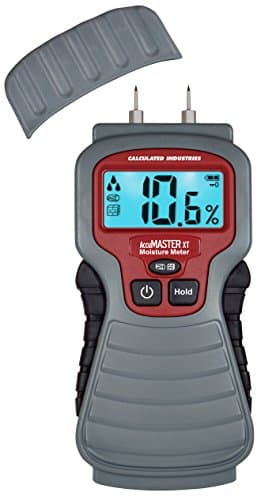
Every rule of thumb about how long to wait — a week per inch, a month, a season — is a proxy for the thing you can measure directly. A moisture meter costs less than one good board and tells you what is actually happening.
The technique that matters more than the absolute reading: take a reading, wait a week, take another. When the number stops moving, the board has reached equilibrium with your shop, and that is when it is ready to work — whatever the calendar says.
Sticker everything
Stacking boards face to face traps moisture between them, so the outside faces dry and the inside faces do not. That differential is exactly what cups a board.
Stickers are thin strips — commonly around 3/4 in. square — laid across the stack between layers so air circulates around every face. Three rules make them work:
Align them vertically. Every sticker must sit directly above the one below. A sticker with nothing under it becomes a fulcrum, and the boards bend around it.
Space them evenly, commonly every 16 to 24 inches, and always at the very ends of the boards. An unsupported end is where a board droops and where it splits.
Use dry stickers of the same species, or at least a bland one. Wet stickers leave stains; oak stickers on maple leave marks you will be planing out later.
Keep it off the concrete
A concrete slab wicks ground moisture continuously, and boards lying on it take that moisture up from one face only. That is the fastest way to cup a board in a garage shop, and it is entirely avoidable.
Get everything at least a few inches clear of the floor — a rack, a pallet, sleepers, anything that keeps air moving underneath. The same applies to leaning boards against an exterior wall that condenses in cold weather.
Racks: vertical or horizontal?
Horizontal is better for the wood. Boards supported along their length at regular intervals stay flat, and the stack is easy to sticker properly. It needs wall space and cantilevered arms strong enough for the load — lumber is heavier than people estimate, and a rack failure is genuinely dangerous.
Support arms every 24 to 32 inches along the wall, anchored into studs rather than drywall. Sag between supports becomes a permanent bow in the boards.
Vertical — boards stood on end against a wall — is space-efficient and much easier to sort through, which is a genuine advantage in a small shop. The trade-off is that a board standing on end in a rack with any lean to it will slowly take that lean permanently. For short offcuts it is fine; for long, expensive boards it is a compromise. Store vertically only if the boards are genuinely upright and supported at more than one height.
Whichever you choose, plan it into the shop before the machines go in — our garage workshop layout guide covers where lumber storage fits alongside everything else fighting for wall space.
Seal the end grain
End grain gives off moisture many times faster than face grain, which is why boards check and split at the ends first. A coat of end-grain sealer, or even old paint, slows that down and saves you cutting inches off every board.
If you buy rough lumber in quantity, this is one of the cheapest things you can do. If you buy surfaced boards a few at a time and use them quickly, it matters much less.
Mill in two stages
The habit that makes the biggest difference to flat parts costs nothing. Rough-mill your boards oversize — a little thick, a little wide, a little long — then leave them stickered for a few days. Releasing the internal stresses lets the board move, and it will. Then mill to final dimension.
A board that was going to cup will cup during those few days, when it is still oversize and you can flatten it on the jointer and planer. The alternative is that it cups after you have cut the joinery.
What we could not verify
Equilibrium moisture content depends entirely on your local climate and shop conditions, so we deliberately quote no target number — measure your own with a meter. The stickering, rack and milling practice above is standard published guidance, not something we tested.