Put the sander flat on the wood, switch it on, and move it slowly — about an inch a second — with no more pressure than the weight of the tool. That is ninety per cent of it. A random orbital sander is designed to cut at a specific rate, and pushing down does not make it cut faster. It stalls the orbit, turns the random pattern into a repeating one, and produces exactly the swirl marks people buy a better sander to avoid.
Here is the whole technique, in the order it matters.
1. Let the tool's weight be the pressure
The pad spins on an offset bearing and is free to wobble; that free motion is what makes the scratch pattern random. Press down and you load the bearing, the pad stops floating, and the orbit collapses into something closer to a rotary sander — which leaves arcs. Rest your hand on the tool to guide it, not to weight it.
You can hear this happening. An unloaded sander has a high, even note; a pressed sander drops in pitch. If the pitch drops when you touch the work, you are pressing.
2. Move at about one inch per second
That is far slower than most people move. The pad has to pass over a given spot enough times to let the random pattern average out; move quickly and you leave a line of half-sanded scratches that only show up under finish. One inch a second is roughly the pace of a slow, deliberate wipe with a cloth.
3. Overlap each pass by half a pad
Work in straight, overlapping passes with the grain, each one covering half the width of the last. Then, for a surface that has to take a clear finish, do a second set of passes at right angles to the first. The point is coverage, not direction — a random orbit sander does not care about grain direction the way a belt sander does, but your eye will catch a strip that got half the attention of its neighbours.
4. Start and stop on the wood
Switch the sander on with the pad already flat on the work, and switch it off before you lift it. A spinning pad lowered onto a surface lands on one edge and digs a crescent; a pad lifted while spinning flicks grit across the panel. Both marks are easy to see and annoying to remove.
5. Keep it flat, especially at the edge
Tip the sander and all the work happens on one side of the pad, which rounds an edge over before you notice. At the edge of a panel let about a third of the pad hang off and keep the tool level; do not chase the corner with the pad tilted into it. On a narrow rail, support the overhanging side with your other hand on the housing rather than on the pad.
6. Change the disc before you think you need to
An abrasive that has stopped cutting is not neutral — it burnishes, which closes the wood surface and causes a stain to go on unevenly. Discs are cheap relative to the time you spend sanding. If you find yourself pressing harder to get the same result, that is the signal, and pressing harder is the exact thing rule one says not to do.
7. Connect it to a vacuum, not just its bag
Dust between the disc and the wood is loose grit, and loose grit scratches. Extraction pulls it through the pad holes instead, which keeps the abrasive cutting and roughly doubles how long a disc lasts. The onboard bag or canister catches some of it; a shop vac or dust extractor catches most of it. This is also the difference between sanding indoors and filling the room with the fine dust described in wood dust health risks.
What to buy, if the sander is the problem
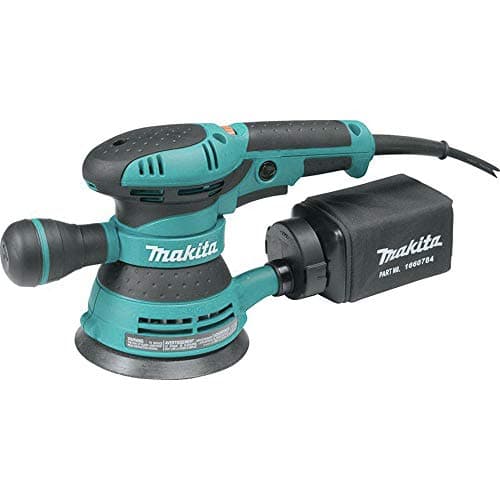
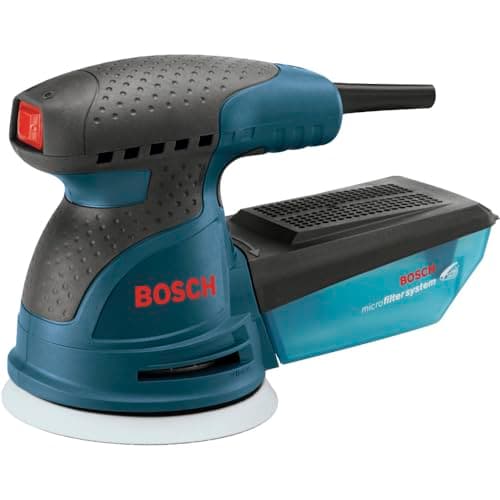
Technique fixes most sanding complaints, but not all of them. The three features worth having are variable speed (so you can slow down near veneer, edges and finish), a 5 in. hook-and-loop pad (because that is the size every abrasive in every store fits) and a working extraction port. The three sanders below all publish those; they differ in how comfortable they are over a long session and in price.
The three side by side
Published listing specifications for the three sanders above. Every one is a 5 in. variable-speed random orbit sander, which is the specification that matters for the technique on this page.
| Sander | Pad | Speed | Dust handling |
|---|
| Bosch ROS20VSC | 5 in. | Variable, 2.5 A | Dust canister |
| DeWalt DWE6423 | 5 in. | 8,000–12,000 OPM, variable | Dust bag |
| Makita BO5041 | 5 in. | Variable, corded | Dust bag |
Which grit, and when to stop
A random orbital sander is a finishing tool more than a shaping one, so the grit sequence does most of the work. Start no coarser than the surface needs, climb without skipping more than one step, and stop at the grit your finish wants — which is coarser than most people expect if you are staining. The whole sequence, including the stain-versus-clear-coat difference, is in sanding grit progression.
Two jobs this tool is wrong for
Flattening.A random orbital sander follows the surface it is given. It will not flatten a cupped board or level a glue line that is proud, it will just thin the high spots slightly and polish the rest. Flattening is a plane, planer or drum sander job — flattening a board without a jointer covers the options if you have no machine.
Heavy stripping. Taking four coats of paint off a door with a 5 in. orbital sander is possible and miserable. For stripping, read best sander for refinishing furniture, which covers where a belt sander genuinely helps and where it will destroy the piece.
If it is still leaving marks
Work through why your sander leaves swirl marks — it goes cause by cause, in the order worth checking. Nine times out of ten it is a loaded disc, a grit jump, or dust trapped under the pad, and all three are free to fix.
Where these numbers come from
The pad sizes, amperages, OPM ranges and dust-handling details above are the manufacturers' own published listing specifications, cited per tool in Sources. The technique on this page is standard practice drawn from manufacturer operating instructions and our own shop experience; we have not measured surface roughness, because we do not run a lab — see our methodology page. Prices come from the live price feed and carry the date they were pulled.