Pick the chisel first and let its width become the mortise width — then set your mortise gauge to the chisel itself rather than to a number. That one decision removes most of the difficulty: the walls are then cut by a tool that exactly fits them, and a chisel that fits its own mortise cannot wander off line. For furniture-scale work, a 1/4 in. or 3/8 in. chisel is the usual answer.
The second rule is the order: cut the mortise before the tenon. A mortise is a fixed hole; a tenon can be pared to fit whatever hole you made. Do it the other way round and you are trying to hit a dimension with a chisel, which is a much harder game. We say more about the joint itself, including proportions, in the mortise and tenon guide — this page is specifically about chopping the hole by hand.
Before you start: the honest note about chisels
The traditional tool for this is a dedicated mortise chisel — a thick, square-sided blade with a hefty handle, made to be levered against. It is not among the sets we rank, and we are not going to pretend otherwise.
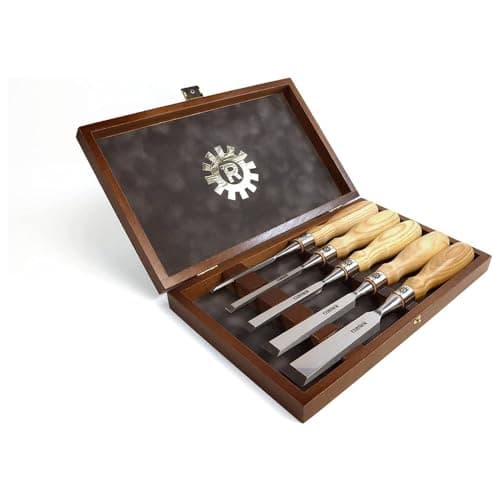
A good bevel-edge bench chisel will chop a mortise in furniture-scale stock perfectly well, provided you work in stages and resist using it as a crowbar. What you must not do is lever hard sideways against the thin side lands of a bevel-edge blade; that is how edges chip and how the cheaper sets come apart. If you are cutting mortises every week, a dedicated mortise chisel is a genuine upgrade. If you are cutting eight for a table, the chisels below will do it.
Lay it out
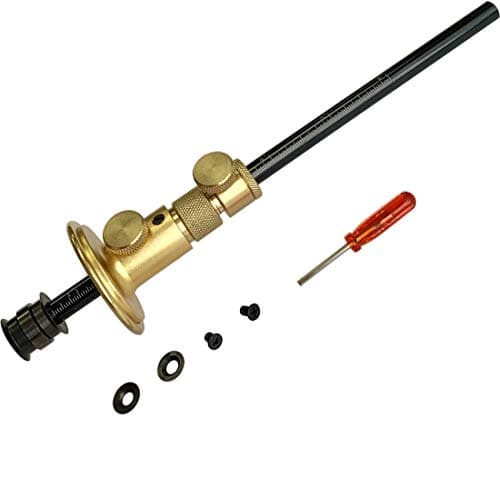
Mark the mortise length with a knife and a square, then set a mortise gaugeso its two pins sit exactly on the edges of your chisel — not to a measurement. Scribe both walls from the same face of the workpiece on every part of the project, so that any error in the gauge setting is identical on every joint and the parts still line up. The gauge technique is in how to use a marking gauge.
A mortise in a leg is normally centred, but centring is less important than consistency. If every mortise is scribed from the outside face, a frame will assemble square even if the mortises are a sixteenth off centre.
Mark the depth on the chisel
Wrap a piece of masking tape around the chisel at the depth you want, or set a bar gauge beside the work. You cannot see into a mortise while you are chopping it, and the most common hand-cut mortise failure is going through the far side of a leg. Depth is usually a third of the stock thickness for a blind mortise, and the tenon should be a touch shorter than the mortise is deep so glue and debris have somewhere to go.
Chop it, from the middle outwards
Hold the chisel vertical, bevel facing one end of the mortise, and start about a quarter of an inch in from the far end — not on the end line. Then:
- Drive the chisel in a few millimetres with a mallet. Light blows, square to the work.
- Move back about an eighth of an inch towards you and chop again. The waste between the two cuts breaks loose as a chip.
- Work back along the mortise in those steps until you are a quarter inch from the near end, then lever the chips out with the chisel laid bevel-down in the trench you have made.
- Repeat the pass, going a few millimetres deeper each time. Stop when the tape reaches the surface.
- Last of all, pare the two end walls back to the knife lines with the chisel held vertical and struck lightly. Cutting the ends first, before the waste is out, is what causes blown-out ends.
The chips should come out as crumbly flakes, not as long splinters. Long splinters mean you are taking too much per blow, and the chisel is following the grain rather than cutting across it.
Clean the walls, then test the fit
Pare the side walls only if they need it — a mortise chopped with a chisel that matches its width usually does not. Check the bottom is reasonably flat with the chisel laid in flat, but do not chase perfection down there; nobody sees it and a slightly uneven floor does not weaken the joint.
Then fit the tenon. It should go in with firm hand pressure and no mallet, and it should hold itself in place when you lift the assembly. A tenon that needs hammering will split the mortise walls when the glue swells the wood, and one that falls in has no glue surface worth the name.
Two shortcuts that are not cheating
Drill first. Boring a line of overlapping holes with a brace or a drill press, slightly inside the lines, removes most of the waste and leaves the chisel to clean the walls. It is faster, it is traditional, and it is far more forgiving. Keep the holes a hair shy of the depth you want.
Buy the machine. If you are cutting mortises in quantity, a benchtop mortiser does in seconds what the above does in twenty minutes, and we rank them at best benchtop mortiser. A hand-cut mortise is a skill worth having and a poor use of a Saturday if you need forty of them.
What makes the difference: the three tools below
You need a chisel that will take mallet blows and hold a chopping edge, a mallet with enough head mass to drive it without you swinging hard, and a gauge that can be set to the chisel. Those three, and a stone to keep the chisel sharp, are the whole kit.
The kit side by side
Published listing specifications for the four tools above. Head mass is the figure to read on the mallets: more mass means fewer, lighter swings, which is the whole point when you are making a hundred blows per mortise.
| Tool | Job | Published specifications |
|---|
| Narex Richter bevel-edge chisels (5) | Chops and pares the mortise | Cr-V steel, claimed 62 HRC, set of 5, ash handles |
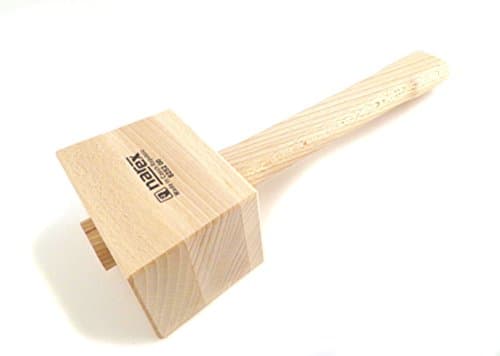
| Narex 460 g beech mallet | Drives the chisel; light and controllable | 460 g / 16 oz, beech head, round face, one-piece turned |
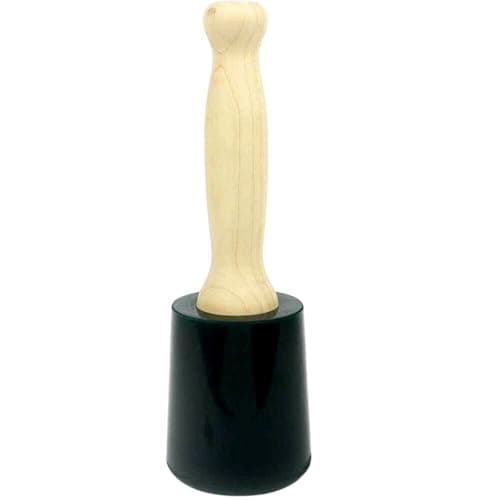
| Wood Is Good WD202 urethane mallet | Drives the chisel over long sessions | 30 oz head, urethane face, hardwood handle, dead-blow feel |
| iGaging mortise and wheel marking gauge | Scribes both walls at the chisel's width | Twin cutters, micro-adjust, 1/32 in. and 1 mm scales |
Which mallet, and why there are two here
The 16 oz beech mallet is the one for paring taps and for light chopping in mild hardwood: it is controllable, it is cheap, and a wooden face is kind to a wooden handle. The 30 oz urethane mallet is the one for a session of real chopping — the extra mass does the work so your arm does not, and the dead-blow face does not bounce, which means more of each blow goes into the cut.
If you buy one, buy on the stock you work: beech for cherry, poplar and pine; the heavier urethane head for oak, ash and maple. The full ranking is at best woodworking mallet.
Sharpening is not optional on this job
Chopping end grain and cross grain dulls an edge faster than any other hand-tool operation, and a dull chisel in a mortise compresses fibres rather than severing them — which is why a mortise suddenly starts needing harder blows halfway through. Expect to hone mid-mortise on hardwood. The sequence is in how to sharpen chisels, and the stones are at best sharpening stones.
Keep the bevel at around 25 to 30 degrees for mortising — the steeper end of what you would use for paring. A thinner edge is keener and chips sooner, and in a mortise you are hitting the tool rather than pushing it.
Mortise width, tenon thickness, and the one-third rule
The conventional proportion is a tenon about a third of the thickness of the stock, which is where the 1/4 in. chisel in 3/4 in. material comes from. It is a rule of thumb rather than a law: thicker tenons leave thinner mortise walls, which is the actual failure mode in a thin leg, and thinner tenons give up glue area. If your chisel sizes do not land on a third, use the nearest chisel you own and adjust the tenon to it, because the chisel-matched mortise is worth more than the arithmetic.
If you want the joint explained rather than the hole cut, including haunches, wedges and where a mortise and tenon beats a dowel or a pocket screw, read the mortise and tenon guide and wood joint types explained.
Where these numbers come from
The steels, hardness claims, head weights, face materials and gauge graduations above are the manufacturers' own published listing specifications, cited per tool in Sources. The proportions and the chopping sequence are standard practice, not measurements we took; we do not run a lab, and our methodology page says so. Prices come from the live price feed and carry the date they were pulled.