The most common cause by a wide margin is a worn or clogged disc being pressed harder to compensate. Change the disc, take your hand weight off the tool, and most swirl marks stop appearing. If they do not, the remaining causes are a grit you skipped, dust trapped under the pad, a tilted pad, or a single coarse grain dragging across the surface — and each one leaves a slightly different mark.
First, find out whether you actually have swirls
Bare sanded wood hides almost everything. Wipe the surface with mineral spirits (or water, if you are going to use a water-based finish) and look across it at a low angle with a light behind. The wet surface shows you what the finish will show you, and it will reveal three different defects that people all call swirls:
- True swirls: small, repeating arcs or circles, spread fairly evenly over an area. A pattern problem.
- Pigtails: isolated squiggles, like a tiny comma, in otherwise clean wood. Usually one loose grain of coarse grit that got under the pad.
- Cross-grain scratches: straight lines running across the grain, often from an earlier coarse grit that was never sanded out.
Knowing which of the three you have cuts the diagnosis in half, because true swirls are a technique or abrasive problem, pigtails are a cleanliness problem, and cross-grain scratches are a grit-sequence problem.
The six causes, in the order worth checking
1. The disc is worn or loaded
An abrasive stops cutting long before it looks finished. Once the grain tips are rounded or the gaps between them are packed with dust and resin, the disc burnishes instead of cutting — and burnishing plus pressure is what prints an orbit pattern into the surface. If a disc has been on the tool for more than a few minutes of real work, replace it before you change anything else.
2. You are pressing on it
A random orbit sander's pad must be free to wobble; that free motion is what keeps the scratch pattern from repeating. Press and the offset motion stalls, so the tool behaves more like a rotary polisher, which leaves arcs. The weight of the tool is the correct pressure — the full technique is in how to use a random orbital sander.
3. You skipped a grit, or did not finish one
Each grit removes the scratches left by the one before it. Jump from 80 straight to 150 and the 150 cannot erase the 80-grit scratches — it just polishes the surface around them, and under finish they read as a swirl field. Climb in steps and do not skip more than one step; the sequence we use is in sanding grit progression.
4. Dust is trapped between the disc and the wood
Loose dust under the pad is loose abrasive. Without extraction it has nowhere to go, so it rolls around under the disc and scratches as it goes. This is the cause most people never consider, and it is also the one with the clearest fix: connect the sander to a vacuum. Check, too, that the disc's holes line up with the pad's holes — a universal disc on a pad with a different hole pattern blocks extraction completely.
5. The pad is tilted, worn or the wrong one
Tilting the sander concentrates the cut on one side of the pad. The result is a crescent rather than a field of swirls, usually near an edge or a corner where you were chasing something. Separately, a pad whose hook-and-loop has gone bald lets the disc shift microscopically under load, and a pad with a damaged edge marks every pass in the same place.
6. One stray coarse grain
This is what causes pigtails, and it is maddening because the tool and the disc are both fine. A grain of 80 grit left on the bench, on the workpiece or in your shirt gets under a 150-grit disc and drags. The fix is housekeeping: blow or vacuum the work and the bench between grit changes, and do not stack discs of different grits face to face.
How to remove swirls that are already there
Go back one grit from the one that produced them, sand the whole surface properly at that grit, then climb again. Do not try to spot-sand the marks out — a localised patch at a coarser grit becomes a dish that will show up under finish as surely as the swirls did.
For the final grit on a surface taking a clear coat, a light hand-sanding pass with the grain using a block takes out anything the machine left. It is two minutes of work and it is the single most reliable way to guarantee a clean surface.
When the tool genuinely is the problem
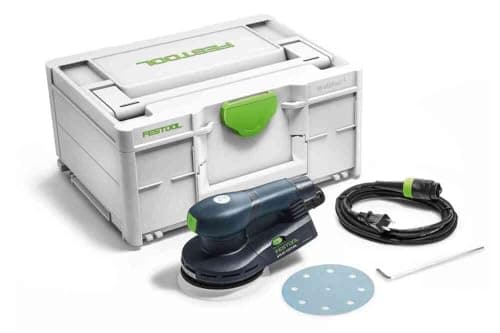
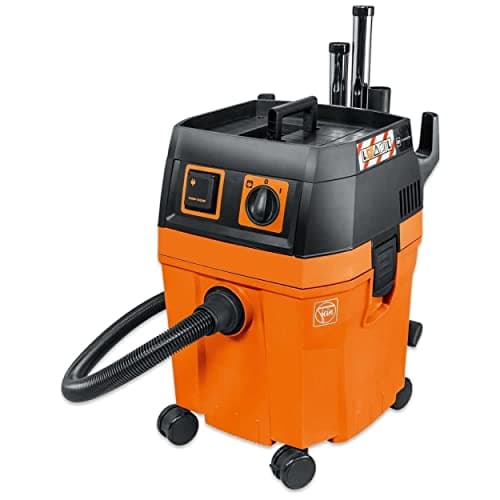
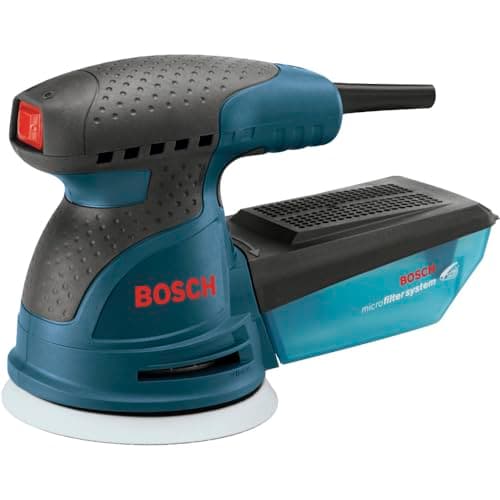
Three hardware situations cause marks that no technique fixes: a sander with no speed control that only runs flat out, a pad or bearing that has play in it after a hard life, and no extraction at all on a job that produces a lot of dust. The three picks below address exactly those — a variable-speed sander, a short-stroke finishing sander, and the extractor to plug either into.
The three side by side
Published listing specifications for the three picks above. The stroke figure on the Festool is the relevant one for this page: a shorter stroke removes less per revolution and leaves a finer scratch, which is what a finishing sander is for.
| Tool | Type | Published specifications | What it fixes |
|---|
| Bosch ROS20VSC | Random orbit sander | 5 in. pad, 2.5 A, variable speed, dust canister | No speed control; worn pad on an old tool |
| Festool ETS EC 125/3 EQ | Random orbit sander | 5 in. pad, 3 mm stroke, brushless motor | Scratch depth on final grits |
| Fein Turbo II | Wet/dry dust extractor | 8.5 gal, 151 CFM, HEPA filter, 66 dB published | Dust trapped under the pad |
Why extraction is on a list about scratches
It looks like a dust-and-health item and it is one — but it is also, mechanically, a surface-quality item. Pulling dust through the pad holes keeps loose grit out from under the disc, keeps the abrasive cutting rather than clogging, and takes the fine airborne fraction out of the room. If an extractor is more than you want to spend, a shop vacuum with a fine filter and a hose adapter does most of the same work: best shop vac for woodworking ranks the options, and shop vac vs dust collector explains why a collector is the wrong machine for a sander.
Speed control is worth more than power here
The slow end of a variable-speed dial is what lets you work near an edge, over veneer, or on a final grit without the tool getting ahead of you. It is also the setting that produces the least heat, which matters on resinous timber and on anything with finish still on it. If your current sander is single-speed, that alone is a reasonable argument for replacing it — the full ranking is best random orbital sander, and for stripping old finish specifically, best sander for refinishing furniture.
Where these numbers come from
The pad sizes, amperages, stroke lengths, tank capacities, airflow and noise figures above are the manufacturers' own published listing specifications, cited per product in Sources. The diagnostic sequence on this page is standard practice drawn from manufacturer operating instructions and shop experience; we have not measured surface roughness or scratch depth, because we do not run a lab — see our methodology page. Prices come from the live price feed and carry the date they were pulled.