Set the drill guide and the stop collar to the thickness of the piece you are drilling into, pick the screw length that matches that same thickness, clamp the joint before you drive, and put the holes on the face that will not be seen. Those four things are the whole technique, and three of the four come from one measurement.
Pocket-hole joinery is genuinely simple once that is clear, and almost every bad pocket-hole joint comes from getting one of the four wrong. Here they are in order.
Step 1 — measure the stock, not the project
Pocket-hole jigs are set by stock thickness, and “3/4 in.” plywood is routinely 23/32 in. or thinner. Measure the actual board with calipers or a rule and set from that, because the geometry is unforgiving: the screw has to exit the angled hole in the middle of the mating piece's thickness, and an eighth of an inch of error points it at a face.
Note which piece you are measuring. The setting comes from the thickness of the piece that receives the holes, not the piece being joined to.
Step 2 — set both the guide and the collar
There are two adjustments and they must agree.
- The drill guide on the jig sets where the hole enters and at what height, which determines where it exits. Most jigs have a thickness scale; set it to your measured thickness.
- The stop collar on the stepped drill bit sets how deep the hole goes. Too shallow and the screw has no clearance and splits the board; too deep and the bit breaks through the far face.
Set the collar against the jig's reference mark or gauge rather than by eye, tighten it with the hex key, and then drill one hole in an offcut of the same stock and look at it. Thirty seconds on a test piece saves a visible blowout on the project.
Step 3 — choose the screw by length and thread
Two independent choices, and people usually get the second one wrong.
Length follows thickness. For 3/4 in. stock, 1-1/4 in. is the standard answer and the box most shops buy by the hundred. Thinner stock takes shorter screws; 1-1/2 in. stock takes 2-1/2 in. The rule is that the screw should reach well into the mating piece without threatening to come out the other side.
Thread follows the wood. Coarse threadfor softwoods, plywood and MDF — a deeper, more widely spaced thread grips loose fibre. Fine thread for hardwoods such as oak, maple and cherry, where a coarse thread acts like a wedge and splits the grain. Using coarse screws in hard maple is the single most common cause of a split pocket-hole joint.
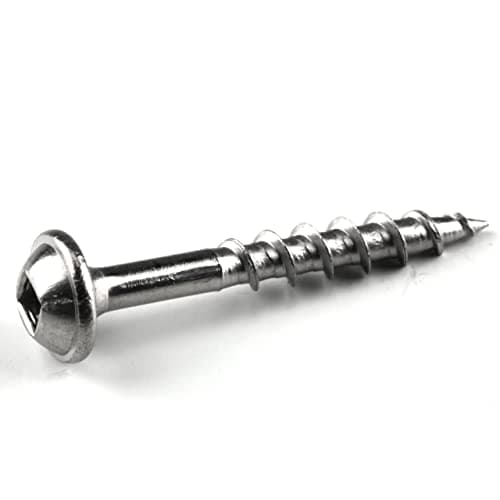
The heads matter too. A pocket screw has a flat washer head designed to bottom out squarely on the shoulder the stepped bit cut, which is what pulls the joint tight. A regular wood screw with a tapered head will keep driving into that shoulder and crack it. Our pocket-hole screw roundup covers the thread and coating choices in full.
Step 4 — clamp the joint, then drive
This is the step people skip and it is not optional. A pocket screw entering at a shallow angle exerts a sideways force on the mating piece as it pulls, and an unclamped joint will creep— the two parts shift out of alignment as the screw tightens, leaving a step at the face you were trying to make flush.
Clamp across the joint, or use a face clamp that holds both pieces against each other at the junction. Then drive slowly, and stop the moment the screw seats. Pocket screws are driven into a cross-grain hole and it is easy to strip or snap one by leaning on the trigger.
Step 5 — put the holes where they will not be seen
Pocket holes are visible, oval, and there is no way to hide them that looks as good as not seeing them. So plan which face takes them before you drill: the inside of a cabinet, the underside of a shelf, the back of a face frame, the inside of an apron.
Where a hole must show, plugs are the answer and they are a compromise — a plug in matching species, sanded flush, reads as a plug. A face frame with holes on the back reads as a face frame. Decide this at layout, not after assembly.
Where glue fits in
Use it on any long-grain joint. A pocket screw is a clamp that stays in the work, and the glue is what makes the joint strong — the same way it is in any other joint. On an end-grain-to-face joint, which is most pocket-hole work, the glue adds less because end grain glues poorly, and the mechanical hold of the screw is doing most of the job.
Which glue barely matters here; the standard interior grade is fine, and Titebond II vs III covers when to step up.
What pocket holes are and are not for
They are excellent for cabinet carcases, face frames, shop furniture, jigs, utility builds and anything where speed matters and the joint does not show. They are not a substitute for a mortise and tenon in a chair or a table base that will be racked for decades, and they are not the joint for a visible corner on fine furniture.
We set out the honest comparison against the invisible alternative in pocket holes vs dowels, and the field of jigs is ranked in the best pocket hole jig. If you have already narrowed it to the two systems used on this page, Massca vs Kreg is the head-to-head.
One more thing worth knowing before you commit to pocket holes as your default: they are a fastener-and-friction joint rather than an interlocking one, which is the axis every other joint in woodworking is arranged along. Wood joint types explained places them against the rest and says plainly what each one is genuinely strong at.
Settings at a glance
The relationship between stock thickness and screw length for the three thicknesses that cover almost all pocket-hole work. The jig and collar settings come from the same column, and every jig ranked above publishes a thickness range that includes these.
| Stock thickness | Screw length | Thread for softwood / ply | Thread for hardwood |
|---|
| 1/2 in. | 1 in. | Coarse | Fine |
| 3/4 in. | 1-1/4 in. | Coarse | Fine |
| 1-1/2 in. | 2-1/2 in. | Coarse | Fine |
The jigs, side by side
Published listing specifications for the three jigs and the screw box above. The stock range is the specification to check against your own material; the clamping method is the one that decides how the jig feels to use.
| Jig | Guide holes | Stock range | Published features |
|---|
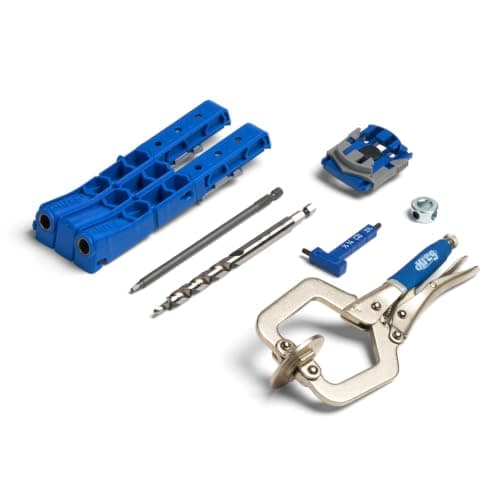
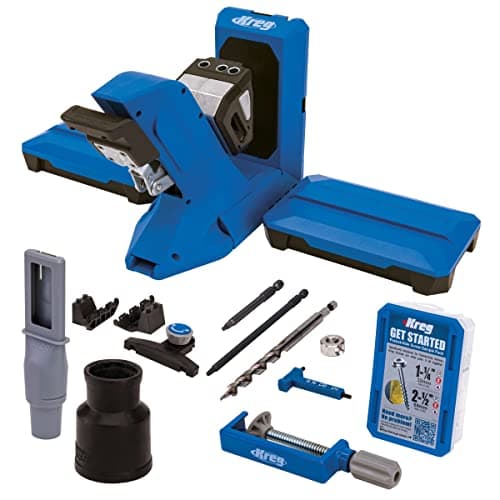
| Kreg 720PRO | Auto-clamp | 1/2–1.5 in. | Docking station, material stops |
| Kreg 320 | 2-hole guide | 1/2–1-1/2 in. | Compact, face clamp included |
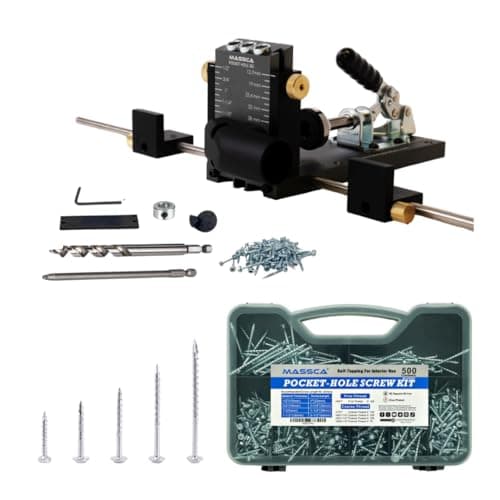
| Massca M2 Pro | Twin-hole | Adjustable | Aluminum body, bundle includes screws |
| Kreg SML-C125-500 | — | Fits 3/4 in. stock | 1-1/4 in. coarse thread, washer head, 500 count |
Bench jig or clamp-on jig?
A bench jig sits on the bench and you bring the workpiece to it, usually with an automatic clamp that grips any thickness in one motion. It is much faster per hole and it is the right choice if you drill pocket holes in batches.
A clamp-on jig attaches to the workpiece, which means it can drill a hole in something already assembled or too large to lift — a cabinet in place, a long rail. It is slower per hole and it goes places a bench jig cannot. Plenty of shops own one of each for precisely that reason.
Why the stepped bit is stepped
A pocket-hole bit has a narrow pilot section and a wider body with a flat shoulder between them. The narrow section drills the pilot the screw threads into; the wider section bores the pocket the screw head travels down; and the flat shoulder is the seat the washer head bottoms out on.
That shoulder is the joint. It is why a pocket screw must have a flat washer head, and why the stop collar depth matters so much — set wrong, the shoulder ends up in the wrong place or not cut cleanly, and the screw either splits the pocket or never pulls the joint tight.
Troubleshooting, in order of how often it happens
- The screw came out the far face. Guide or collar set for thicker stock than you have. Re-measure the board, not the nominal size.
- The joint slipped out of alignment. Not clamped. Clamp across the joint, every time.
- The board split. Coarse thread in hardwood, or the screw too close to an end. Switch to fine thread and keep holes at least an inch from the end.
- The screw spins without tightening. Stripped pilot, usually from over-driving. Back it out, move to a new hole position.
- The head sits proud. Pocket drilled too shallow, so the shoulder is above where the head needs to sit. Reset the collar.
Where these numbers come from
Jig stock ranges, guide configurations, clamping mechanisms, body materials, screw lengths, thread types, head designs and counts above are the manufacturers' own published listing specifications, cited per product in Sources. The thickness-to-screw-length pairings are the standard pocket-hole sizing convention, given as guidance rather than measurement — we have not tested joint strength, we do not have a lab, and our methodology page says so. Prices come from the live price feed.