Fix a dovetail gap with a sliver of the same wood, grain running the same way, glued in and pared flush. Do not fill it with sawdust and glue. A glued sliver takes finish the way the rest of the board does; a sawdust-and-glue mix dries darker than the wood around it and reads as a brown scar under any clear finish you put over it. The sliver takes four minutes and is close to invisible. That is the whole answer, and the rest of this page is about which gap you have and how to stop producing it.
First, read the gap
Dovetail gaps are not generic. Where the gap sits tells you exactly which step went wrong, and that matters more than the repair — because the repair fixes one joint and the diagnosis fixes every joint after it.
A gap along the baseline, on the shoulder
The joint closes but there is a line of daylight where the end of one board meets the face of the other. The cause is almost always that the baseline was scribed shallower than the mating board is thick, or that the waste between the tails was not pared quite down to the line, leaving a high spot that holds the shoulder off.
Check with a square across the socket floor. If it rocks, the floor is proud in the middle. The fix on the next joint is a gauge set directly off the mating board rather than to a measurement — see how to use a marking gauge.
A gap beside a pin or a tail, on the angled wall
This is the classic triangular gap at the top or bottom of an angled face. It means the saw cut fell on the wrong side of the knife line — into the piece you wanted to keep rather than into the waste.
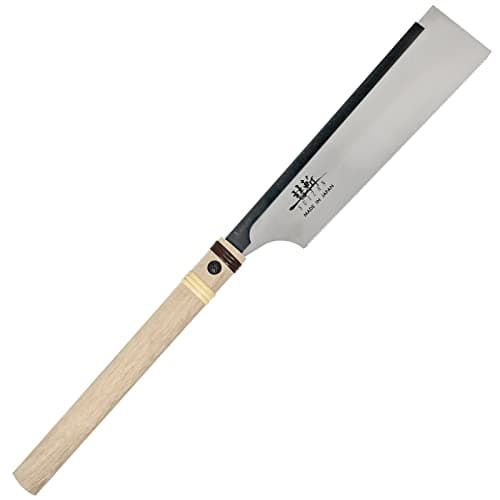
The habit that prevents it: put the saw plate in the knife line and leave the whole line visible on the keep side, so the kerf consumes only waste. Sawing accuracy is also a saw problem; a plate with no back, or one with too coarse a tooth, will not follow a line regardless of intent (best dovetail saw).
A gap that only appears when you force the joint together
If the joint needed a mallet and then opened a gap elsewhere, the joint is too tight and something has been crushed or deflected. Take it apart, find the tight spot — it will show as a bruised, shiny patch — and pare that, not everything.
Pins or tails standing proud or sitting below the surface
Not a gap, and not a problem: cut the parts a hair over-long, then plane or pare the proud end grain flush after glue-up. Parts that finish below the surface are the ones to worry about, and they come from cutting to exact length.
Three repairs that look honest
1. The glued sliver, for a gap you can see into
Plane a shaving off an offcut of the same board, so the colour and grain match. Cut a wedge from it, orient the grain the same way as the wood either side of the gap, put glue on the sliver and tap it in until it stops. Leave it proud, let the glue cure, then pare it flush with a sharp chisel and sand lightly.
Two details decide whether this is invisible or obvious. Grain direction is the first: a sliver with its grain running across the gap will catch light differently and show as a bright line. The second is to pare rather than sand it flush — sanding rounds the edges of the repair and drives dust into the seam.
2. The wedge in the kerf, before glue-up
If you can see the gap during a dry fit, you can often fix it before it exists. Make the saw cut at the back of the socket slightly deeper and drive a thin wedge of the same wood into that kerf as you glue up: the wedge spreads the tail and closes the gap from the inside. This is traditional practice on through dovetails and on wedged tenons, and it makes a mechanically stronger joint rather than a cosmetically patched one.
3. Compressing the fibres, for a hairline
For a gap too thin to take a sliver, burnish the end grain beside it with a smooth round shank — the back of a chisel handle ferrule, a screwdriver shaft — rolling the fibres towards the gap. Wood crushes and moves; a few thousandths of an inch of fibre can be pushed over to close a hairline. Then wet it slightly and it swells further.
Use this honestly: it works on hairlines and it does not work on real gaps. On a gap you can see light through, burnishing just produces a dented, shiny area next to a gap.
The fix to avoid
Sawdust mixed with PVA glue is the internet's favourite answer and it is wrong for a show surface. The glue soaks into the dust and dries several shades darker than the surrounding wood, and because it is a non-porous plug, it refuses stain and seals the pores around it. It is fine inside a carcase where nobody will look. On the front of a drawer it reads as a repair from across the room.
Commercial wood filler has the same problem plus shrinkage. If a gap genuinely cannot be slivered, a better answer is usually to re-cut that part — drawer sides are cheap and a second attempt is faster than you expect.
Which glue, and why hide glue is on this page
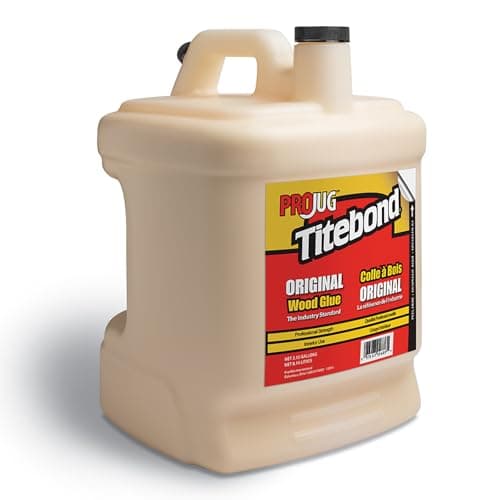
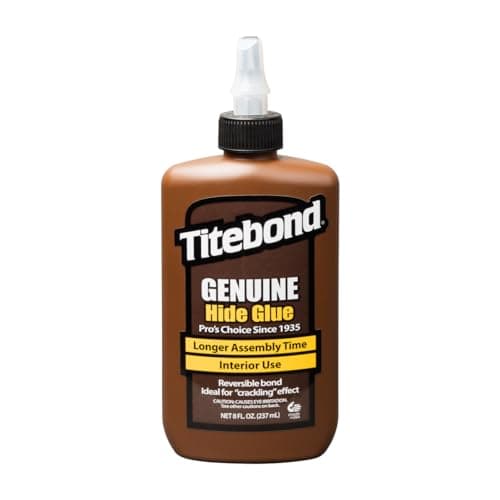
For the joint itself, a standard aliphatic resin glue is the right choice and the long open time is what matters when you are assembling a drawer with sixteen mating surfaces. For a repair, liquid hide glue has one property PVA does not: it is reversible with heat and moisture, so a sliver you got wrong can be removed rather than chiselled out, and it takes stain more like wood does. The two glues below cover both cases, and the wider ranking is at best wood glue.
The four side by side
Published listing specifications for the four picks above, with what each one does in this job. The chisel and the saw are the tools that prevent the gap; the two glues are what you use once there is one.
| Pick | Role here | Published specifications |
|---|
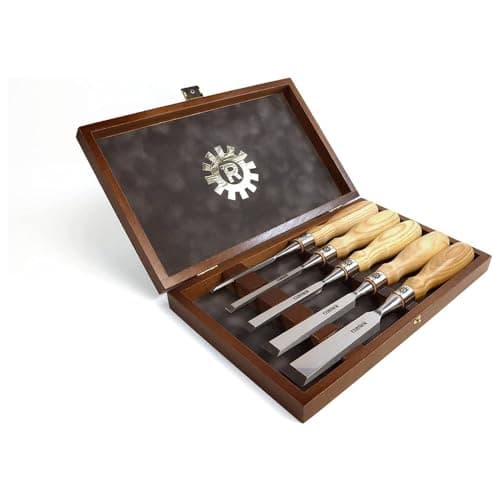
| Narex Richter bevel-edge chisels (5) | Pares to the baseline; trims the sliver flush | Cr-V steel, claimed 62 HRC, set of 5, ash handles |
| Suizan dozuki dovetail saw | Cuts in the knife line so the gap never forms | 9.5 in. blade, cross-cut teeth, pull stroke, rigid back |
| Titebond Original (16 oz) | Assembly glue; sands cleanly | 16 oz, interior use, aliphatic resin, sands cleanly |
| Titebond Liquid Hide Glue (8 oz) | Repairs and slivers; reversible if you get it wrong | 8 oz, reversible with heat and moisture, long open time, no mixing |
Prevention, in the four places it is won
Knife the lines. A pencil line is wider than the error you are trying to avoid. A knife line gives the saw a slot to start in and the chisel a wall to register against.
Scribe the baseline off the mating board. Not off a rule. The baseline has to equal the real thickness of the other board, and a gauge set against that board is exact by construction.
Saw on the waste side, every time. Decide which side of each line is waste before you pick the saw up, and hatch the waste with a pencil. More first dovetails are lost to sawing the wrong side of a line than to any skill deficit.
Pare to the line, from both faces. Chop most of the waste, then pare the last shaving with the chisel registered in the scribed baseline. Work in from both faces so neither one blows out. The full sequence is in how to cut dovetails, and the chisels for it are at best chisels for dovetails.
Router-cut dovetails: a different gap, a different fix
If the joint came off a jig, a gap is not a sawing error — it is a bit-depth setting, and it will be identical on every joint you cut at that setting. Raise the bit a few thousandths to tighten, lower it to loosen, and do it on test stock of the same thickness rather than on the drawer. See how to cut dovetails with a router and best router for a dovetail jig, which covers why fine depth adjustment matters more on a jig than horsepower does.
Know when to stop
A hand-cut dovetail with a hairline at one pin is a hand-cut dovetail. Furniture in museums has gaps in it. The repair that looks worst is almost always the over-worked one — sanded, filled, re-filled and then stained to blend, which draws the eye to exactly the spot you were hiding.
Fix what you can with a sliver, leave what you cannot, and put the effort into the next joint. If you are glueing up a carcase with these joints, the clamping sequence matters more than the gap does — how to glue up a panel covers the open-time arithmetic that decides whether an assembly goes together calmly.
Where these numbers come from
The steels, hardness claims, blade lengths, volumes and glue properties above are the manufacturers' own published listing specifications, cited per product in Sources. The repair techniques are standard practice rather than tests we ran; we do not run a lab, and our methodology page says so. Prices come from the live price feed and carry the date they were pulled.