Skip to content
Dovetail & Dust

HUB 04 · Joinery & Jigs

How to Glue Up a Panel

The operation with a countdown timer attached. Here is the preparation that makes a panel glue-up boring, which is exactly what you want it to be.

By Stephen V.Updated How we research
#ad

We earn a commission when you buy through our Amazon links, at no extra cost to you. It never changes our rankings, and we say so when the cheaper tool is the better buy. How this works.

A panel glue-up is the only woodworking operation with a hard deadline. Once glue is on the wood you have a few minutes to get every joint closed, every board aligned and every clamp on before the adhesive starts to grab. Which is why practically everything that matters happens beforehand.

Step 1: joint the edges properly

A glued edge joint in solid wood is stronger than the wood around it — but only if the two edges meet along their whole length with no gap. Glue does not fill gaps; it fails in them.

Get straight edges from a jointer, a table saw with a good blade, a track saw, or a jointer plane. Then check the joint properly: hold the two boards edge to edge against a light and look for any gap. A gap you can see light through is a joint that will open in a season.

The spring joint

Traditional practice is to leave the middle of the joint a hair hollow — a shaving or two — so the clamps close the center first and the ends are held under slight compression. Board ends dry out and shrink faster than the middle, and a spring joint pre-loads against exactly that. It is not essential, but it is why old panels stay closed at the ends.

Step 2: arrange the boards before you commit

Lay the boards out and shuffle them until you are happy, then mark a triangle across the whole panel face. That triangle tells you instantly which board goes where and which way up — far more reliable than remembering.

Two arrangement questions. Grain appearance: match color and figure across the joints so the panel reads as one piece rather than five boards. Cupping: the old advice is to alternate growth rings so cupping cancels out, which produces a washboard surface instead of one big curve. The alternative is to arrange for the best appearance and rely on the panel being held flat by the piece it goes into. For a tabletop that is unsupported, alternate; for a door panel in a frame, arrange for looks.

Plane direction matters too

If you will hand-plane the panel afterwards, try to arrange the boards so the grain runs the same direction across the whole panel. Otherwise every joint is a place where you have to reverse your planing direction.

Step 3: work out your clamps and cauls

Clamp spacing. A clamp exerts pressure in a cone spreading out from the jaw at roughly 45 degrees. For 3/4 in. stock that means one clamp roughly every 6 to 8 inches along the joint gives you continuous pressure. Two clamps on a 4-foot panel is not enough, whatever it looks like.

Alternate above and below. A clamp under the panel pulls the middle down; a clamp over it pulls the middle up. Alternating them cancels the bowing that a row of clamps on one side always induces.

Parallel-jaw clamps are worth their price here. A pipe or F-clamp with jaws that tilt under load pushes the panel out of flat. Parallel jaws stay square to the work, which is exactly what a panel needs — see our clamp roundup for the difference.

Cauls. A caul is a stiff batten clamped across the panel, usually with a slight crown planed into it so it bears in the middle first. Two pairs of cauls across a panel hold the boards level with each other and are the single most effective way to eliminate the sanding that mismatched boards create.

Step 4: do a dry run

Assemble everything with no glue. Clamps set to roughly the right opening, cauls positioned, boards in triangle order. You are checking three things: that every joint closes, that the panel sits flat, and that you can physically reach every clamp handle once it is all together. Fix any of those problems now, when there is no clock running.

Step 5: glue and clamp

Apply an even bead along one edge of each joint and spread it to a thin, continuous film — a cheap silicone brush or a roller is better than a finger. Both edges do not need glue; one well-spread edge transfers to the other under pressure.

Bring the clamps up gradually, working from the center outward, and stop when squeeze-out appears as an even line of small beads along the whole joint. That even line is the signal you want. More pressure is not better — over-clamping starves the joint of glue and bows the panel.

If boards keep sliding out of register as the clamps come up, a couple of brads driven into the waste at each end will pin them while you tighten. A brad nailer is worth owning for exactly this: it is not fastening the panel, it is stopping the boards moving while the glue grabs.

Choose the adhesive for open time, not for strength. Every wood glue in our glue roundup is stronger than the wood; what differs is how long you have to work. On a five-board panel in a warm shop, a standard PVA gives you less time than you think.

Step 6: squeeze-out, and when to remove it

Wait until the squeeze-out goes from wet to rubbery — usually 30 to 60 minutes — then pare it off cleanly with a chisel or a scraper held at a low angle. Wiping it wet with a damp cloth spreads dilute glue into the surrounding grain, where it blocks stain and shows up as a pale halo under finish. That halo is the classic beginner glue-up mistake and it is almost impossible to fix afterwards.

Step 7: leave it alone

Clamps can usually come off within an hour or two, but the joint is not at full strength for considerably longer — check the manufacturer's stated cure time on the bottle. Leave the panel stickered flat overnight before you plane, sand or cut it. A panel worked too soon can creep at the joints.

Flattening afterwards

If you used cauls and the boards were milled to matching thickness, there should be very little to do — a random orbital sander will handle it. For anything with mismatched joints, a drum sander or a hand plane is the tool. A panel is usually too wide for a benchtop planer, which is precisely the gap those two fill.

What we could not verify

We have not tested clamp pressures or joint strength ourselves. Open times and cure times vary by adhesive and by shop conditions — the bottle is the authority, and we say so rather than quoting a number that may not match yours.

The short answer

Quick picks

#ProductBest forScorePrice
01
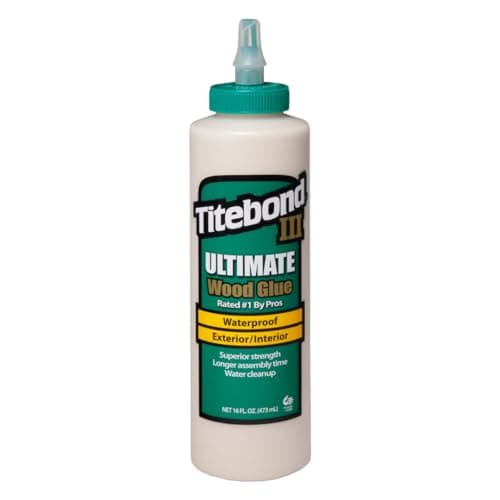
Titebond Titebond III Ultimate Wood Glue (16 oz)
Titebond III Ultimate Wood Glue (16 oz)

The waterproof one, and — less advertised but more useful — the one with the longest open time. Big glue-ups get calmer the moment you switch to it.

Best for outdoor and big glue-ups
8.6
$9.98Amazon
02
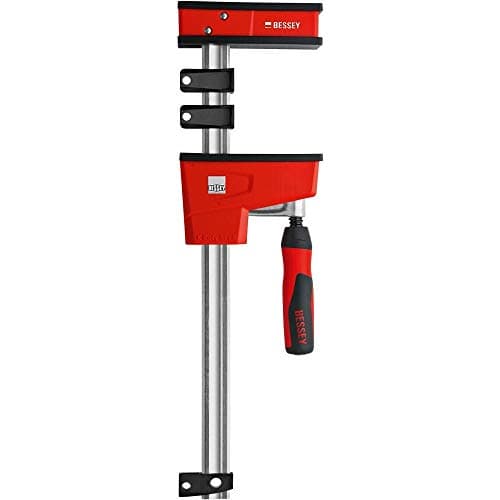
Bessey Bessey KRE3518 K-Body REVO Parallel Clamp (18 in.)
Bessey KRE3518 K-Body REVO Parallel Clamp (18 in.)

The panel-glue-up clamp the pros default to. Big parallel jaws stay square to the work and put down serious, even pressure.

Best for glue-ups
8.0
$39.14Amazon
03
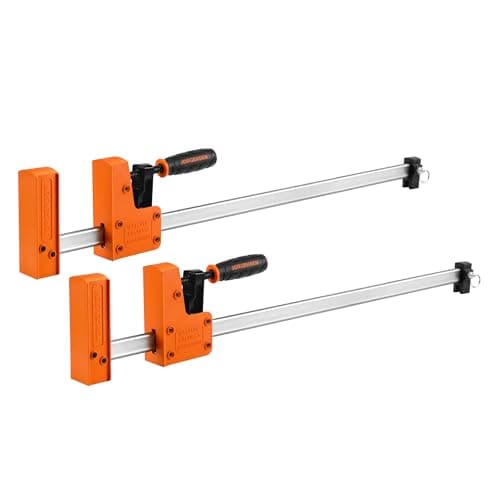
Jorgensen Jorgensen Cabinet Master Parallel Clamp
Jorgensen Cabinet Master Parallel Clamp

A parallel clamp at a friendlier price than the top brand. Self-squaring jaws and a stable foot make it a real glue-up clamp for less.

Best parallel value
7.8
$79.99Amazon
04
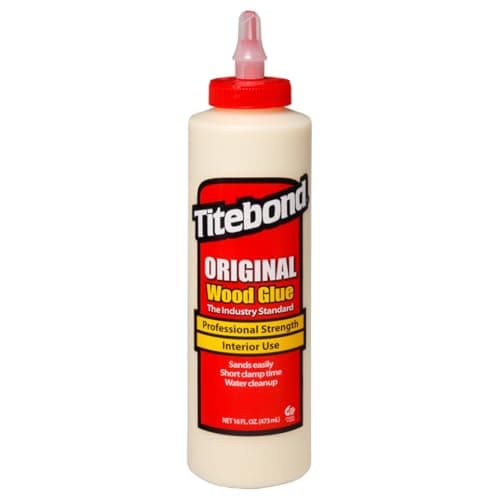
Titebond Titebond Original Wood Glue (16 oz)
Titebond Original Wood Glue (16 oz)

The shop-standard interior glue. Fast tack, a joint stronger than the wood around it, and it sands without gumming the paper — which is exactly why it is the default.

Best overall
7.4
$5.58Amazon

#ad · Live prices from the Amazon Product API, as of Sep 1, 2026. Where we have no verified live price, we show none — we would rather leave a gap than print a number that has rotted.

In detail

The picks, in full

01
Titebond Titebond III Ultimate Wood Glue (16 oz)

Best for outdoor and big glue-ups

Titebond III Ultimate Wood Glue (16 oz)

16 ozANSI Type I waterproofLonger open timeDark glue line
8.6/10

The waterproof one, and — less advertised but more useful — the one with the longest open time. Big glue-ups get calmer the moment you switch to it.

Strength
9
Open time
8
Water resistance
10
Sandability
8
Value
8

Pros

  • ANSI Type I waterproof rating covers outdoor furniture and cutting boards
  • Longer open time is the real reason to keep a bottle — complicated assemblies stop being a race
  • Rated by the manufacturer for indirect food contact

Cons

  • Dries to a darker line than Original or II, which shows in pale woods
  • Most expensive of the three Titebonds

Don't buy this if…

you glue pale hardwoods and hate a visible line. Original or II leave a lighter joint.

$9.98View on Amazon

Price as of Sep 1, 2026. Prices change — Amazon's is the one that counts.

#ad · we may earn a commission from this link to Titebond III Ultimate Wood Glue (16 oz)

02
Bessey Bessey KRE3518 K-Body REVO Parallel Clamp (18 in.)

Best for glue-ups

Bessey KRE3518 K-Body REVO Parallel Clamp (18 in.)

Parallel K-body1,700 lb nominal force18 in. capacityWide flat jaws
8.0/10

The panel-glue-up clamp the pros default to. Big parallel jaws stay square to the work and put down serious, even pressure.

Clamping force
10
Build
9
Versatility
7
Ease of use
8
Value
6

Pros

  • Parallel jaws stay perpendicular to the bar, so panels come out flat, not bowed
  • Very high clamping force closes gaps other clamps can't
  • Rail-protecting jaws and a stable base let it stand up during assembly

Cons

  • Expensive — this is the clamp you buy a few of, not a dozen
  • Heavy and bulky to store

Don't buy this if…

you mostly need to hold parts while you drill or assemble — that is a job for cheap trigger clamps, and these are overkill for it.

$39.14View on Amazon

$43.4510% off

Price as of Sep 1, 2026. Prices change — Amazon's is the one that counts.

#ad · we may earn a commission from this link to Bessey KRE3518 K-Body REVO Parallel Clamp (18 in.)

03
Jorgensen Jorgensen Cabinet Master Parallel Clamp

Best parallel value

Jorgensen Cabinet Master Parallel Clamp

Parallel jaws~1,000 lb force90° self-squaringStands upright
7.8/10

A parallel clamp at a friendlier price than the top brand. Self-squaring jaws and a stable foot make it a real glue-up clamp for less.

Clamping force
8
Build
7
Versatility
7
Ease of use
8
Value
9

Pros

  • Parallel jaws keep panels flat, like the premium clamps
  • Costs less than the category leader while doing most of the same job
  • Stands on end for easy one-person assembly

Cons

  • Fit and finish are a step below the top brand
  • Slightly lower rated force than the premium parallel clamps

Don't buy this if…

you want the absolute best jaw flatness and longevity for a lifetime of daily use — the premium parallel clamps edge it there.

$79.99View on Amazon

Price as of Sep 1, 2026. Prices change — Amazon's is the one that counts.

#ad · we may earn a commission from this link to Jorgensen Cabinet Master Parallel Clamp

04
Titebond Titebond Original Wood Glue (16 oz)

Best overall

Titebond Original Wood Glue (16 oz)

16 ozInterior useAliphatic resinSands cleanly
7.4/10

The shop-standard interior glue. Fast tack, a joint stronger than the wood around it, and it sands without gumming the paper — which is exactly why it is the default.

Strength
9
Open time
6
Water resistance
3
Sandability
9
Value
10

Pros

  • Grabs quickly, so a rubbed joint holds while you fetch the clamps
  • Sands and machines without the gummy smear that softer glues leave
  • Cheapest per ounce of the Titebond line

Cons

  • Not water resistant — interior work only
  • Short open time makes big, complicated glue-ups stressful

Don't buy this if…

the piece will ever live outdoors or see standing water. Step up to II or III.

$5.58View on Amazon

Price as of Sep 1, 2026. Prices change — Amazon's is the one that counts.

#ad · we may earn a commission from this link to Titebond Original Wood Glue (16 oz)

How we picked

We do not run a testing lab

We researched published manufacturer specifications, manuals and spec sheets, ran the arithmetic those specs support, and read owner reviews at volume, then scored each tool against a published rubric. The scores are judgments from documented research — they are not measurements we took, because we do not have a lab and we are not going to pretend we do. Where a number came from a manufacturer's document, we name it and link it in Sources.

Questions

Frequently asked

How many clamps do I need for a panel glue-up?
Roughly one every 6 to 8 inches along the joint for 3/4 in. stock, alternating above and below the panel. Clamp pressure spreads in a cone from the jaw, so spacing them wider leaves sections of the joint with no pressure at all.
Should I alternate the growth rings when gluing up a panel?
For an unsupported panel such as a tabletop, yes — alternating turns one large cup into several small ones. For a panel held flat by a frame or a carcass, arrange for the best grain appearance instead; the structure will keep it flat.
When should I remove glue squeeze-out?
When it has gone rubbery, typically half an hour to an hour in, and with a chisel or scraper rather than a wet cloth. Wiping wet glue spreads it into the grain, where it blocks stain and appears as a pale patch under finish.
Do I need to joint the edges, or can I glue up straight off the saw?
You can if the saw leaves a genuinely straight, square edge and the two boards meet with no light showing through. Check by holding them together against a light. Any visible gap is a joint that will open later — glue does not fill gaps.

Keep reading

Receipts

Sources

We do not run a testing lab, and we do not pretend to. Our picks come from published manufacturer specifications and manuals, the arithmetic those specs support, and owner reviews read at volume. Where we could not verify something, we say so on the page rather than quietly leaving it out. Read our full method.