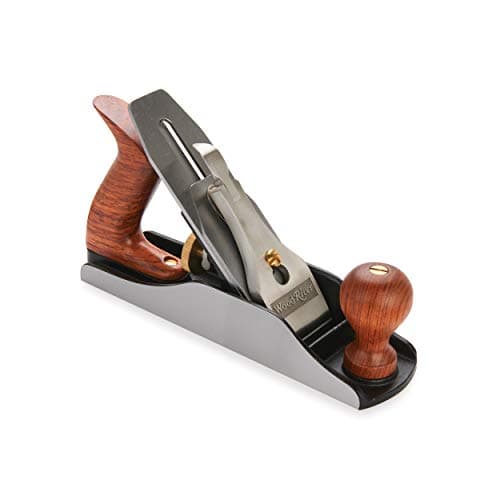
A hand plane is a chisel held at a fixed angle in a jig. Everything you do when tuning one is either about the sharpness of that chisel, the angle it sits at, or how much of it projects — in that order of importance. Most people spend their time on the sole, which is the least important thing on the list.
This applies to a new budget plane and to a flea-market Stanley alike. Our hand plane roundup covers which to buy; this is what to do once it is on the bench.
1. Sharpen the iron — properly, and first
Nine times out of ten, “this plane will not cut” means “this iron is dull”. New planes are not sharp; they are ground. Old planes are rusty. Do this before anything else, because a sharp iron in a mediocre plane cuts, and a dull iron in a perfect plane does not.
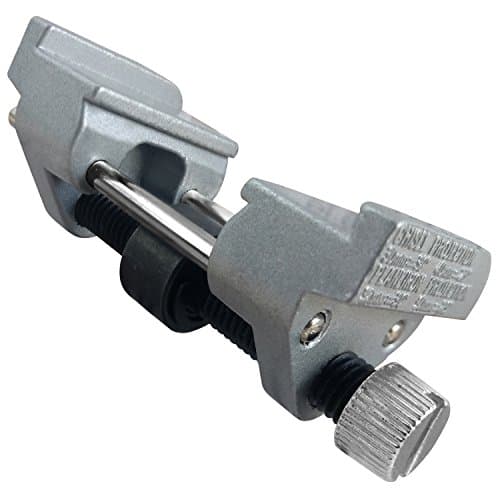
Flatten the back of the iron near the edge until it is uniformly polished — once, properly, for the life of the tool. Then hone the bevel at a consistent angle, working up through your grits until you raise and remove a burr. The full sequence is the same one in our chisel sharpening guide, and a honing guide makes it repeatable while you are learning.
Camber: a slight curve, deliberately
A dead-straight iron leaves a step at each edge of the cut. Most planes want a very slight camber — a curve across the width — so the shaving thins out at the sides. A smoothing plane wants just enough that you cannot see it; a jack plane for rough stock removal wants a pronounced curve you can see clearly. A shooting-board plane wants none at all.
2. Set the chipbreaker close
The chipbreaker (or cap iron) sits on top of the cutting iron and its job is to bend the shaving sharply as it rises, which stops the fibers ahead of the edge from lifting and tearing out. That only works if it is set close to the edge — a fraction of a millimeter on a smoothing plane.
Two conditions. Its front edge must mate with the back of the iron with no gap at all, or shavings jam under it and the plane clogs every second stroke. And it must be square to the iron, or the gap varies across the width. Lap the leading edge of the chipbreaker on a stone until it seats tight, and check by holding the assembly to a light.
A tight, close-set chipbreaker does more for tear-out in figured wood than any other adjustment on the plane. It is also the one most often left at whatever the factory did.
3. Set the mouth and the depth
A tight mouth supports the fibers immediately ahead of the cut, which also fights tear-out. On a bevel-down bench plane the mouth is adjusted by moving the frog forward; on a block plane there is usually an adjustable toe plate. Close it until a thin shaving just passes without jamming.
Set depth by sighting down the sole from the front with the plane upside down until the edge appears as a thin dark line. Then adjust laterally until that line is even across the mouth. Always make the final depth adjustment by advancing the iron, never by retracting it — that takes up the slack in the adjuster and stops the setting drifting as you plane.
4. Flatten the sole — only if you need to
This is where most tuning articles start and where most plane owners waste a weekend. What a sole actually needs is for three areas to be coplanar: the toe, the area immediately in front of the mouth, and the heel. The rest can be hollow and it makes no difference to the cut.
Test before you do anything. Assemble the plane fully with the iron retracted (tension from the lever cap changes the sole's shape, so testing a bare body is meaningless), then try a straightedge along and across it, or mark the sole with a marker and take a few strokes on abrasive stuck to something flat. If the marker disappears from the toe, the mouth and the heel, stop — you are done.
If it genuinely is out, work through abrasive on plate glass or a machine table, checking frequently. Do not chase a mirror finish. A plane that takes a full-width shaving is a flat enough plane.
5. The small things that stop it feeling gritty
Clean and lightly oil the adjuster threads so depth changes are smooth and predictable. Check the frog seats fully on its mating surfaces; a frog rocking on grit chatters. Ease the sharp arrises along the sides of the sole with a file so the plane does not cut your hands. Wax the sole — a rub of paraffin or candle wax reduces friction noticeably and costs nothing.
Where to stop
A well-tuned plane takes a full-width shaving you can read through, leaves a surface that needs no sanding, and does it without you fighting it. Once you have that, further tuning is a hobby rather than an improvement. Put the plane down and use it.
What we could not verify
This is the standard published tuning sequence, laid out in order of effect. We have not measured sole flatness or shaving thickness on specific planes; the reasoning about chipbreaker distance, mouth opening and camber is how the tool works.