The working sequence is 80 → 120 → 150 → 180, start at whichever of those the defect actually requires, and stop at 180 if you are staining. Never skip more than one grade in the ladder. That is the whole method. The reasons behind each part of it are what stop you wasting an afternoon or ruining a stain job in the last ten minutes.
What sanding is actually doing
Sandpaper does not smooth wood. It cuts thousands of parallel scratches into it, and each finer grit cuts a set of shallower scratches that remove the previous set. “Smooth” is the point at which the scratches are too fine for your eye to resolve or your hand to feel.
Two consequences follow, and they explain every rule on this page. First, a grit can only remove scratches it is coarse enough to reach the bottom of — which is why skipping grades leaves the old scratches in place under a polished surface. Second, the finish you apply has to grip those scratches, which is why sanding too fine can make a stain fail.
The sequence, and where to start in it
Start at the coarsest grit the problem needs, not at the coarsest grit you own. Starting too coarse creates work; starting too fine means you are polishing a defect rather than removing it.
- 60–80 grit— removing mill marks from rough-sawn stock, levelling a glue line, taking down a high spot, shaping. This is stock removal, not sanding.
- 100–120 grit— the usual starting point for a board that came off a planer or a jointer and only has light machine marks.
- 150 grit— the usual starting point for a board that is already flat and clean. Also the finishing grit for anything getting paint.
- 180 grit— stop here for oil-based stain on most hardwoods. This is the most common correct stopping point in furniture work.
- 220 grit— stop here for a clear film finish with no stain, and for softwoods that would otherwise look fuzzy.
- 320 grit and up— between coats of finish, never on bare wood you intend to stain.
Why you cannot skip grits
Each grit has to cut deep enough to remove the scratch pattern left by the one before. Jump from 80 to 180 and the 180 paper is physically incapable of reaching the bottom of an 80-grit scratch — it just rounds over the ridges between them. You get a surface that feels smooth and shows every coarse scratch the moment a finish goes on and the light rakes across it.
The practical rule: never skip more than one grade in the ladder. 80 to 120 is fine. 80 to 150 is a gamble. 80 to 180 will cost you the afternoon you thought you were saving.
Where to stop, and the mistake that ruins stain jobs
Sanding finer is not better. Stain works by lodging pigment in the pores and scratches of the surface. Sand to 320 and you have burnished the wood: the scratches are too shallow to hold pigment, the pores are partly packed with dust, and the stain goes on pale, patchy and blotchy. Worse, it goes on unevenly, because the areas you sanded hardest take the least color.
So: 180 before stain, 220 before a clear film finish, 150 before paint. If you have already sanded too fine and the stain is going on badly, the fix is to go back down to 150 and work up again — not to apply more stain.
Raise the grain before the last grit
Wipe the surface with a damp cloth, let it dry fully, and sand lightly at your final grit. The water swells the crushed fibres that sanding pressed down, standing them up so the last pass cuts them off instead of leaving them to swell when a waterborne finish hits them.
This step costs ten minutes and is the difference between a surface that stays smooth under finish and one that turns fuzzy on the first coat. It matters most on softwoods and on anything getting a water-based finish.
Which machine does which part of the sequence
A random orbital sanderis the right tool for 80 through 220 on flat surfaces, and it is the only powered sander that leaves no directional scratch pattern — the pad both spins and orbits, so the scratch direction is constantly changing and no single scratch line survives to show under finish.
A belt sanderbelongs at the bottom end only, and only when you have a real stock removal problem. It is a cutting tool with the dynamics of a planer and it will put a hollow in a panel in seconds — we are blunt about that in the belt sander roundup.
By hand, with a block, for the final grit on anything that will be stained, and for every edge and profile. A sanding block keeps the paper flat so you do not round over a crisp arris you spent time creating.
What you should notdo is use the sequence above to flatten a board. That is a planer, jointer or hand plane job — flattening a board without a jointer covers the options — and sanding a board flat is the slowest and least accurate route to it there is.
The grit chart
Grit numbers are an inverse scale — the number counts abrasive particles per unit area, so a bigger number means smaller particles and a finer cut. This table maps each band to the job it is for and the next step in the ladder.
| Grit | What it is for | Step up to |
|---|
| 60–80 | Stock removal, mill marks, levelling glue lines | 120 |
| 100–120 | Starting grit after a planer or jointer | 150 |
| 150 | Starting grit on clean stock; final grit before paint | 180 |
| 180 | Final grit before stain on hardwood | Stop (or 220 for clear finish) |
| 220 | Final grit before a clear film finish; softwoods | Stop |
| 320+ | Between coats of finish only | — |
The three sanders, side by side
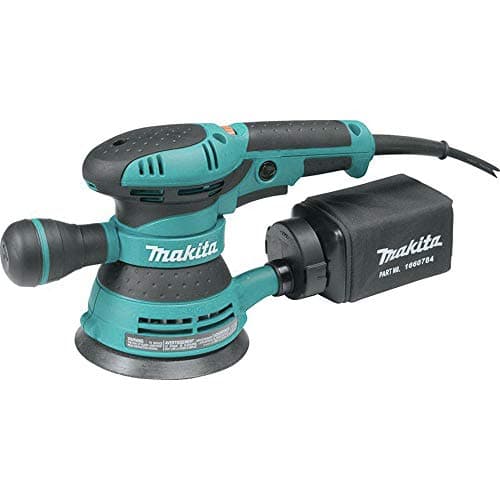
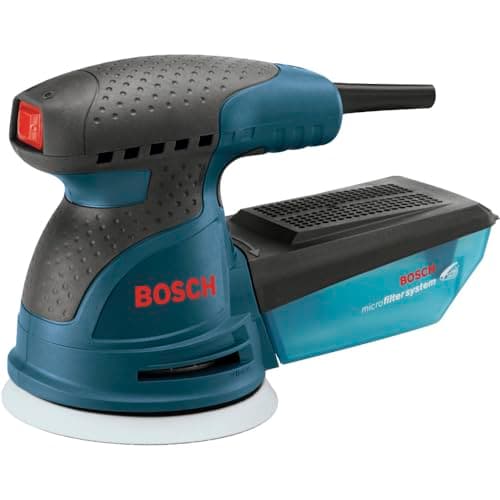
Published listing specifications for the sanders ranked above. All three are 5 in. hook-and-loop machines, which is the pad size the widest range of cheap discs is made in — a real consideration when the sequence above means buying four grits of everything.
| Sander | Pad | Speed | Dust |
|---|
| Bosch ROS20VSC | 5 in. | Variable, 2.5 A | Onboard canister |
| Makita BO5041 | 5 in. | Variable, corded | Dust bag |
| DeWalt DWE6423 | 5 in. | Variable, 8,000–12,000 OPM | Dust bag |
Variable speed is for the finish, not the wood
All three sanders publish a variable speed control, and the useful application is narrow but real. Slow the pad down on veneer, on edges where the sander can tip, and on anything where heat is a risk — soft resinous pine, or a surface with old finish on it that will gum the disc as it melts. Run it at full speed on bare hardwood.
Pressure is the mistake that costs the most time
A random orbital sander works by letting the pad orbit freely. Push down on it and you stall the random motion: the pad stops freewheeling, the scratch pattern becomes a set of concentric circles, and those circles show up under finish as swirl marks you then have to sand out by hand.
Let the machine's own weight do the work and move it slowly — roughly an inch per second — with the pad flat. If the sander is not cutting, change the disc; a loaded disc feels like a sander that needs more pressure and is in fact a sander that needs new paper.
Dust collection is not about tidiness here
Sanding dust is the finest dust a woodworking shop produces, which makes it both the worst for your lungs and the most destructive to the surface: loose grit from a coarse disc trapped under a fine one will cut a scratch no amount of further sanding removes.
Vacuum the surface and blow out the pad between grits. Connect the sander to an extractor rather than running the onboard bag if you can — our shop vac roundup covers the machines that suit, and wood dust health risks sets out why the fine fraction is the part to care about.
Where these numbers come from
Pad sizes, amperage, orbit rates and dust collection arrangements above are the manufacturers' own published listing specifications, cited per sander in Sources. The grit bands and stopping points are standard finishing practice, stated as guidance rather than measurement — we have not tested stain absorption or scratch depth, we do not have a lab, and our methodology page says so. Prices come from the live price feed.